Tresemme Naturals Conditioner Formula Change and Back Again

Tresseme naturals conditioner
Old formula and New formula (black label & top)
on the shelves side by side

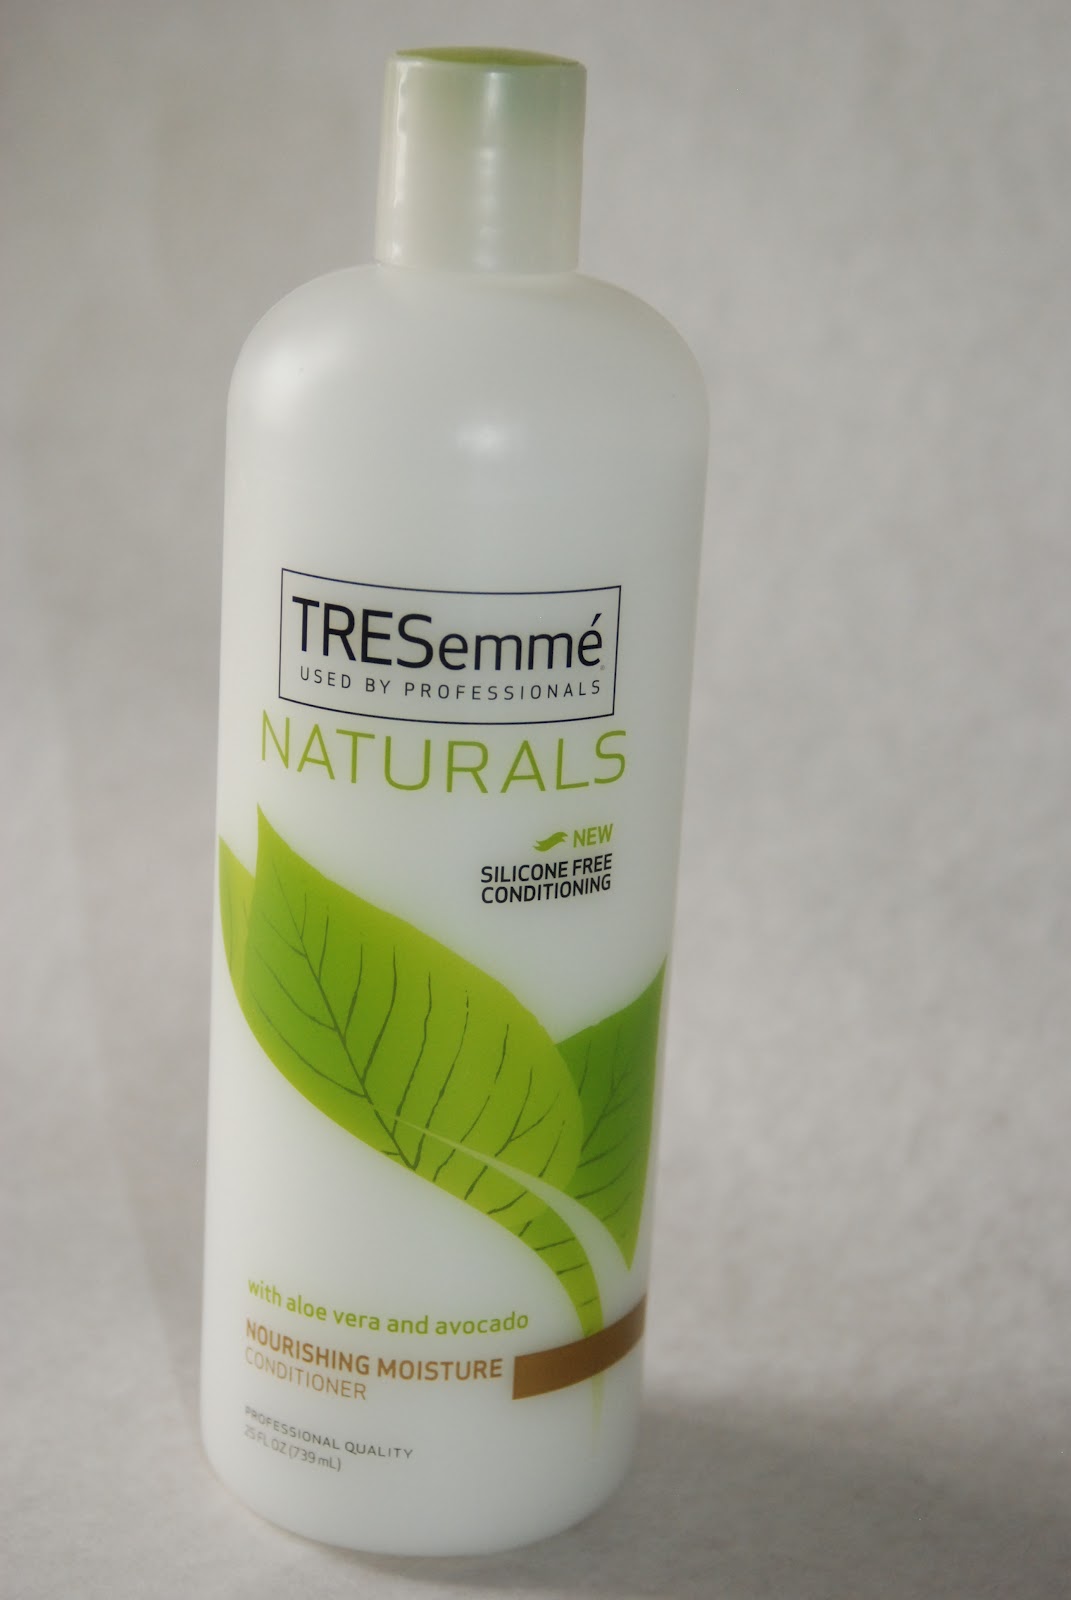
I never even saw it coming and, up until now, was in denial.  Yes, my beloved go-to, all around
conditioner made a change to its’ formulation.  The conditioner in question is from the Tresemme Naturals line.  I’ve always liked the Nourishing Moisture one but the Radiant Volume conditioner was also pretty good.  The first I heard of the change was a few months ago on an online hair forum.  At the time not many people were aware of it and were still wondering if the conditioner was still pretty much the same.  From the looks of it, the new ingredients list made for a drastically different product and even a change in the consistency.

OLD INGREDIENTS LIST
Water(Aqua,EU), Stearyl Alcohol, Cetyl Alcohol, Carprylic/Capric Tryglerceride, Stearmidopropyl Diemthlyamine, Fragrance (Parfum) Lauroyl lysine, Carprylyl Glycol, Brassica Campestris/Aleurites Fordi oil Copolymer,Aspartic acid, Distearyldimonium chloride,Persea Gratissima (Avocado) oil, Citric Acid, Alcohol, isopropyl alcohol, aloe barbadensis leaf juice.

 Why change an already good product?  Well, the Alberto Culver company (VO5, Noxema etc.) was recently taken over by Unilever Corporation (Suave, St. Ives etc.).  The new owners of the Tresemme brand decided to change things up a bit.  This was probably an attempt to save money on ingredients.  However, if you head over to the reviews page for this product on their website, you’ll find that many people expressed their negative views on the change.

Apparently the new company is listening and started putting the old formula back on the shelves with a minor change to the packaging.  There is now a pump installed on the bottle but supposedly the conditioner inside is the same as before.  I say, “supposedly” because I have yet to compare the current ingredient list with the old version (see above).  Once I get this confirmation then I’ll be more than happy to pick up a couple of bottles because this is my staple conditioner we’re talkin’ about here!

On a side note, over the summer, I found out that my hair absolutely loves Aussie Moist conditioner.  It’s very rich and has loads of slip so I will most likely be deep conditioning and detangling with that in the meantime.  It sometimes has a weird reaction with hair gel though so I have to make sure to rinse it completely before styling.  However, I did find out that it works well for conditioner only styling so it’s already pretty far up on my favorites list right now.  If I can’t find my favorite version of the Tresemme I guess this will have to be my new go-to conditioner.  I’ll keep you posted on what I find.

UPDATE 10/2/13-I picked up the old formula recently in a new bottle with a pump on top at Walmart.  Not all stores carry it yet but I’m just glad that my staple conditioner is back on the shelves!

Jumbo Rake Comb Review

When I was talkin’ hair with my mother a couple of months ago she showed me a picture of a comb that she was interested in trying.  She checked out a copy of the book, “The Science of Black Hair” from the library and it listed a “rake” comb as a suggestion for detangling natural hair.  I remembered seeing the comb online (probably in a Youtube video) but didn’t exactly know where to track one down.  Recently however, I was at the Big Beauty Supply Store in Aurora, and noticed some for sale.  It was by the Annie brand and was called a “Jumbo Rake Comb”.   I figured I would grab it for my mom so she wouldn’t have to keep looking for it.  I thought that maybe I would give it a try too and since they were only $1.49 plus tax (USD) I bought two.

Jumbo Rake Comb for only
 $1.49 plus tax!

I didn’t really know what to use the comb for because I already felt like I had every comb that I needed.  I decided to use it one night when I was twisting my hair up after wearing it in a wash n’ go style.  I was surprised at how well the comb detangled my hair.  It’s almost like the front end helped to pull apart the tangles but the spacing toward the back end of the comb allowed my hair to glide right through.  When I saw this I decided to try it the next time I detangled my hair in the shower.

My normal routine for detangling is to do it while my hair is soaking wet and saturated with Tresemme Naturals conditioner.  I usually begin by finger combing my hair first which helps me to remove a lot of the shed hair and tangles before moving onto a comb or my denman brush.  So when I tried the Jumbo Rake comb my hair was already free from any major tangles.  Still, I knew that I would be doing a roller set that night so I needed to make sure my hair was thoroughly detangled beforehand.


My twists
used the rake comb
to detangle


Once again, the comb performed beautifully.  I was really surprised because I didn’t expect for it to be any different from my wide tooth comb.  Somehow though having the teeth closer together toward the front and wider in back is what I think makes it a more effective tool for detangling.  It really is able to pick apart at the tangles but the hair glides through.  You’d have to try it to see what I mean.  As for me, I do think that I’ll be using this instead of my denman brush because it removed shed hairs but not so many to cause concern.

My Mom’s hair sectioned and detangled with
the rake comb

I even tried it a week later when I was straightening my mom’s hair.  She is transitioning to natural and has about two inches of new growth.  I applied Paul Mitchell’s The Conditioner and a heat protectant to each section of her hair and then detangled with the rake comb.  Her hair was only damp but the comb still did a pretty good job.

I give it a thumbs up and would recommend it to anyone looking for a good comb for detangling.

My No Heat Blow Out

I’ve been straightening my natural hair nearly once each month ever since I went natural over three years ago.  I used to blowdry my hair every time but found that it made my straight hair feel dry.  I also felt like using two heat styling tools in one session was too much heat for my hair.  I decided to start using another method to dry my hair before using the flat iron while stretching it at the same time.

Air Drying
Basically, I let my hair air dry which takes longer but works great for me because my hair actually absorbs the product better.  My favorite method is to use ponytails with the ends two strand twisted.  This way the roots lay flatter and the hair dries in a smooth wavy pattern.  You can also use braids but I found that the twists dry quicker and serve the same purpose; stretch the hair while it dries.  Another favorite is to pull all of my hair back into a bun with the front and sides slicked back.  I’ll wear this as a style for a whole day and then at night, part it down the middle and do two french braids to help dry the center.

Brush it Out

Air drying overnight using ponytails with
two strand twists

The final step of the process is to take down the twists or braids and brush the hair out.  I like to use a paddle brush but a wide tooth comb also works.  I realize it’s considered a no-no to do this on dry hair but this is possible because of the products I use.  While my hair is still damp, I always apply a creamy leave-in conditioner, oil and a hair serum on each section.  This makes my hair soft enough to comb through once it is dry.

The Result
When my hair is dry and brushed out, it still looks just as big and stretched as a blowout.  It amazes me that so many naturals grab the blow dryer whenever they want to have stretched hair.  Sure the blowdryer is faster but why risk the damage?   Since I discovered how to do this it has become the method I use to stretch my hair everytime I want to straighten it or see some length.

I use a Creamy Leave-in Conditioner and Hair Serum
for dry hair soft enough to brush through

Wearing a bun all day gets the edges smooth
while drying

Updated Hair Regimen and Products List

I was looking through my blog the other day and noticed that I still had my old regimen from Fall of 2010 up.  There were lots of products listed that I haven’t used in ages so I figured it was time to update it.  Here is my current regimen and products list.  I may make some changes (I always do) but this is what is working for me right now.

NOTE: where products are bulleted I just use one of the items listed

Pre-Cleanse

I part my hair in 4 sections and apply conditioner prior to cleansing with shampoo or conditioner.  This helps to stretch out my shrunken hair and remove any shed hairs.  This step also helps with detangling.

Shampoo-1-2 times per week
  • Elasta QP Creme Conditioning Shampoo 
  • TheraNeem Naturals Moisture Therapy Shampoo (sulfate free)
  • KeraCare Dry & Itchy Scalp Anti-Dandruff Moisturizing Shampoo
  • Neutrogena Triple Moisture Cream Lather Shampoo
Co-wash-1-2 times per week
  • Suave Naturals Coconut Conditioner
  • Tresemme Naturals Nourishing Moisture Conditioner
Rinses-After Shampoo
  • Oil Rinse-I use grapeseed, olive or coconut oil.  I sometimes do this in place of deep conditioning.  This step also helps with detangling.
  • Apple Cider Vinegar Rinse (ACV)-I do this step after using shampoo to help my hair get back to a normal pH.  I either do the rinse before or after applying conditioner
Detangling Method
I detangle while my hair is soaking wet and saturated with conditioner.  The hair is parted in four sections.  I start by finger combing and then use a denman brush on each section.  I do this 2-3 times per week when wearing wash n’ go’s or once per week if wearing stretched styles.

Deep Conditioning Treatments* 1x per week 
  • Hot Oil Treatment with Coconut, Olive or Grapeseed Oils
  • Tresemme Naturals Nourishing Moisture conditioner with Honey or Olive Oil added
 *I do most of my treatments under a hooded dryer for 40 minutes

Moisturizers*

  • Extra Virgin Coconut Oil
  • Aloe & Veg. Glycerin Spray (homemade)
  • Paul Mitchell “The Conditioner” Leave-in
  • Garnier Fructis Leave-in (for heat styling)
  • Hollywood Beauty Olive Creme
To Seal Ends*
  • Coconut Oil mixed with Castor Oil
  • Olive Oil
  • Shea Butter
  • Grapeseed Oil
*I apply Leave-in conditioner after each wash for moisture.  After that I moisturize when needed.

Curl Definers
  •  Eco Gels-The Pink version and Argan Oil (red)
  • Kinky Curly Curling Custard
  • Curls Unleashed Take Command Curl Defining Creme (trial)

*I always use my Paul Mitchell The Conditioner Leave-in under a curl definer for added softnes and moisture


Styling*

Roller Sets, Curly Braidouts,  Wash n Go’s, Puffs, Buns, Banded Ponytails, Flat Twists, French Braids
*Currently taking a long break from heat styling
Henna-Once every 3 months
I have started doing the 2 step Henna/Indigo process which gives me a natural black tone  


What I add to my Henna mix

  • Green Tea and Water (enough to make it the right consistency)
  • Olive Oil (usually add this right before application)
  • Lemon Juice (when I want more color)

    I sometimes add powder to darken the hair and maintain curls.  For my Indigo mix I only add water and a little salt.  For each step (henna & indigo) I make sure to co-wash after rinsing out.  This helps to keep the hair soft.

    My Sort-a Kind-a Curly Girl Method

    Earlier this summer I mentioned in one of my YouTube videos that I was not a fan of the Curly Girl method (CG) because it seemed to do a number on my scalp.  I have issues with dry scalp off and on throughout the year.  This year it seemed to really flare up when I started this method because of the constant conditioner only washing.  Well, I’m still dealing with it now but have gone back to wearing my hair curly everyday.

    Curls Up-close

    I’m not following the CG method exactly but I just don’t see the point in wearing stretched styles when I know my scalp needs to be cleansed more often.  However, I did learn a few things from Lorraine Massey’s book, Curly Girl, the Handbook

    There is one step that I learned from the book which helps immensely with my new daily washing/co-washing routine.  It’s called a, “pre-cleanse”.  With this step you just apply conditioner or sulfate free shampoo prior to getting in the shower to wash your hair (book version).  I altered this method a little because I prefer to apply loads of cheapie conditioner like Suave’s Naturals Coconut (my staple) instead of the amount suggested.  I do this in sections and it really helps me to pull out shed hairs and tangles.  It also elongates my hair which is usually shrunken up into a tight curly fro from the day before.

    I’m still using sulfate shampoo and my favorite leave-in conditioner (Paul Mitchell’s The Conditioner) which has silicones in the ingredients list.  For this reason I can’t say that I’m abiding by the “rules” outlined in the book.  Sulfates and Silicones are big no-no’s with this method but I make sure to use Apple Cider Vinegar (ACV) rinses to help resolve any issues there.  Not only does the ACV help remove build-up but it also helps my hair to return back to a normal pH after using the shampoo.  This is important because this leaves my hair more manageable by closing the cuticle layer back down.  It also helps with moisture retention.  I love ACV rinses!

    My hair is definitely benefitting from all of the moisture it has been getting.  I have been rockin’ wash n’ gos for six weeks straight and can’t really see myself quitting anytime soon.  I usually do my hair at night so I’m not too worried about having wet hair in the mornings when I head out.  Hopefully I will begin to see tons of growth and length retention in the upcoming months.