Protective Style: The Puff Bun

I am slowly gaining on my third year with natural hair and am finding new ways to style my curls.  I have always known that I simply cannot keep my hands out of my hair so sometimes I have to put it away.  More recently though, I have been trying to keep my hair protected for the majority of the time so that by summer I will get to see lots more growth retention (a.k.a. lots-of-hair).

Before now I kept thinking that the only protective styles in my arsenal were Mini Individual Braids, the Donut Bun and French Braids.  Thankfully I have discovered even more ways to tuck my hair away.  I’ll be sharing a few styles in the coming weeks so stay tuned!

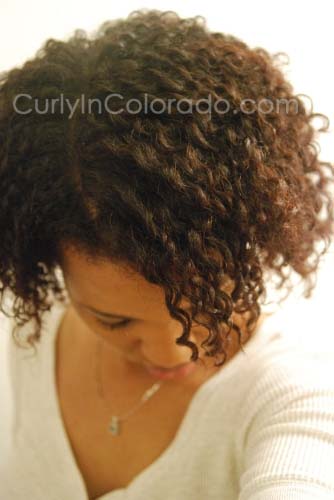
First up is what I call the Puff Bun but I have seen others call it the “Cinna-Bun”.  Basically, I pull my wet hair up into a puff by using an “Ouchless” headband that I wrap around twice.  I use Eco Styler hair gel to help smooth the sides and nape area.  I push the headband back towards the crown until it stops and then spread the puff out to expose the center.  After that I simply push the hair down towards the base.  I then pin sections of the puff with bobby pins and secure the ends of each section near the band underneath.  In the pictures posted I also left out a little hair in front for fluffy bangs.  I used a small clip to secure the ends of the bangs to make a side swoop.  This can also be done with dry hair that has been stretched from a braid-out or twist-out.

I like this style because I don’t have to use any hair gel on the length of my hair for a curly effect because I’ll be tucking the hair under anyway.  This also keeps my ends protected which will help me reach my hair length goals.

I used Eco Styler Gel on the sides
and nape

Ends are tucked under with Bobby Pins

Back View
More Protective Styles to Come!

Wintertime Wash n’ Go

This time of year is always very harsh on my hair and skin due to the dry climate here in Colorado.  I decided to start doing deep conditioning treatments twice a week for added moisture during the winter months.  The wash n’ go style is perfect for this because I’m usually done with the style after two or three days.  Plus, I’ve been reading and watching how other naturals noticed significant growth while wearing the wash n’ go because of the more frequent washing.  I tend to believe that a clean healthy scalp is one contributing factor to this but also the introduction of moisture multiple times per week.  Thing is, it’s winter in Colorado!  Leaving the house with wet hair is not happenin’ right now.  

Instead of waiting until the spring to rock my curly fro, I looked at a few videos by one of my favorite naturals, anaturalbeauty3.  She’s been natural for 2 years and is currently residing in Cali.  Her video on her night time routine illustrates how she puts her curly hair up at night to stretch it out.  I sent her a message asking how she went about reviving the style in the morning.  She replied back that she scrunches her hair with Shea Moistures’ Curl Enhancing Smoothie to wake up the curls.  This was a light bulb moment!  Once I realized that there wasn’t any need to leave the house with a dripping wet head I was on it. 

The Curl Enhancing Smoothie product is not available locally so I decided to try my Palmers Coconut Oil Replinishing Hair Milk.  I thought it would work because of it’s creamy, but wet texture.  I know it plays well with Eco Styler Gel so it was worth a try. 

After a few attempts, I was able to come up with a routine.  The trick is to apply my usual products for my wash n’ go in the evening.  Once it has air dried for a couple of hours, I use the diffuser to get my hair completely dry.  This sets my curls before I wrap it up.  Then, just like in the video, I pull my hair back and secure it with a hair tie.  Any short strands can be pinned down.  I then wrap it with a satin scarf and put on my satin bonnet.  In the morning I just take my hair down, scrunch in some product and that’s it.  I’m so glad to have found this method because it has resulted in hair that is soft, moisturized and easy to style.

CLICK HERE To See how I do my wash n’ go

Natural Style-Flat Twist-Out


While I was transitioning, I learned how to flat twist my hair by watching videos on YouTube.  At first, the technique eluded me and it seemed like I could never get the twists right.  I was always starting each one over and over.  I kept at it and now it is one of my favorite styles.  The only thing I haven’t quite figured out is how to get them to dry faster. 

This weekend I decided to do some flat twisting once again for a soft wavy look.  One thing I figured out is that if I twist in rows from the crown and go back towards my nape, I end up with pretty little spirals that fall down around my face. 
Another tip I picked up over at CurlyNikki.com is to secure each flat twist with a bobby pin so that it doesn’t unravel.  Sometimes I use rollers on the ends for a Twist n’ Curl or just leave the ends out for a faster drying time.  

Flat Twists in Rows for soft
Curls that frame the face
After I washed and conditioned my hair, I applied Giovanni Direct Leave-In and a little olive oil to seal the moisture in. Then I used my Aloe Vera/Water/Glycerin spray to re-wet each section before detangling with my Denman brush.  After that, I twisted each section until the hair began to come away from the scalp and pinned the twist down before twisting to the ends.  

The next day, it was a teeny bit damp so I took them down and used a diffuser to dry the hair completely.  That night I twisted them again and used Palmer’s Coconut Oil Formula Replenishing Hair Milk, a little more water and Shea Butter to set the twists for another day.  This time the twists were shiny and the hold lasted a couple more days without re-twisting. This may be my new wintertime style!